A few things to have ready
- Three clean, undamaged glass jars with wide openings
- White tissue paper and black craft paper
- Water-based decoupage medium suitable for glass
- Soft brush, scissors and a covered work surface
- Battery LED tealights with secured battery compartments
A handmade Halloween glow
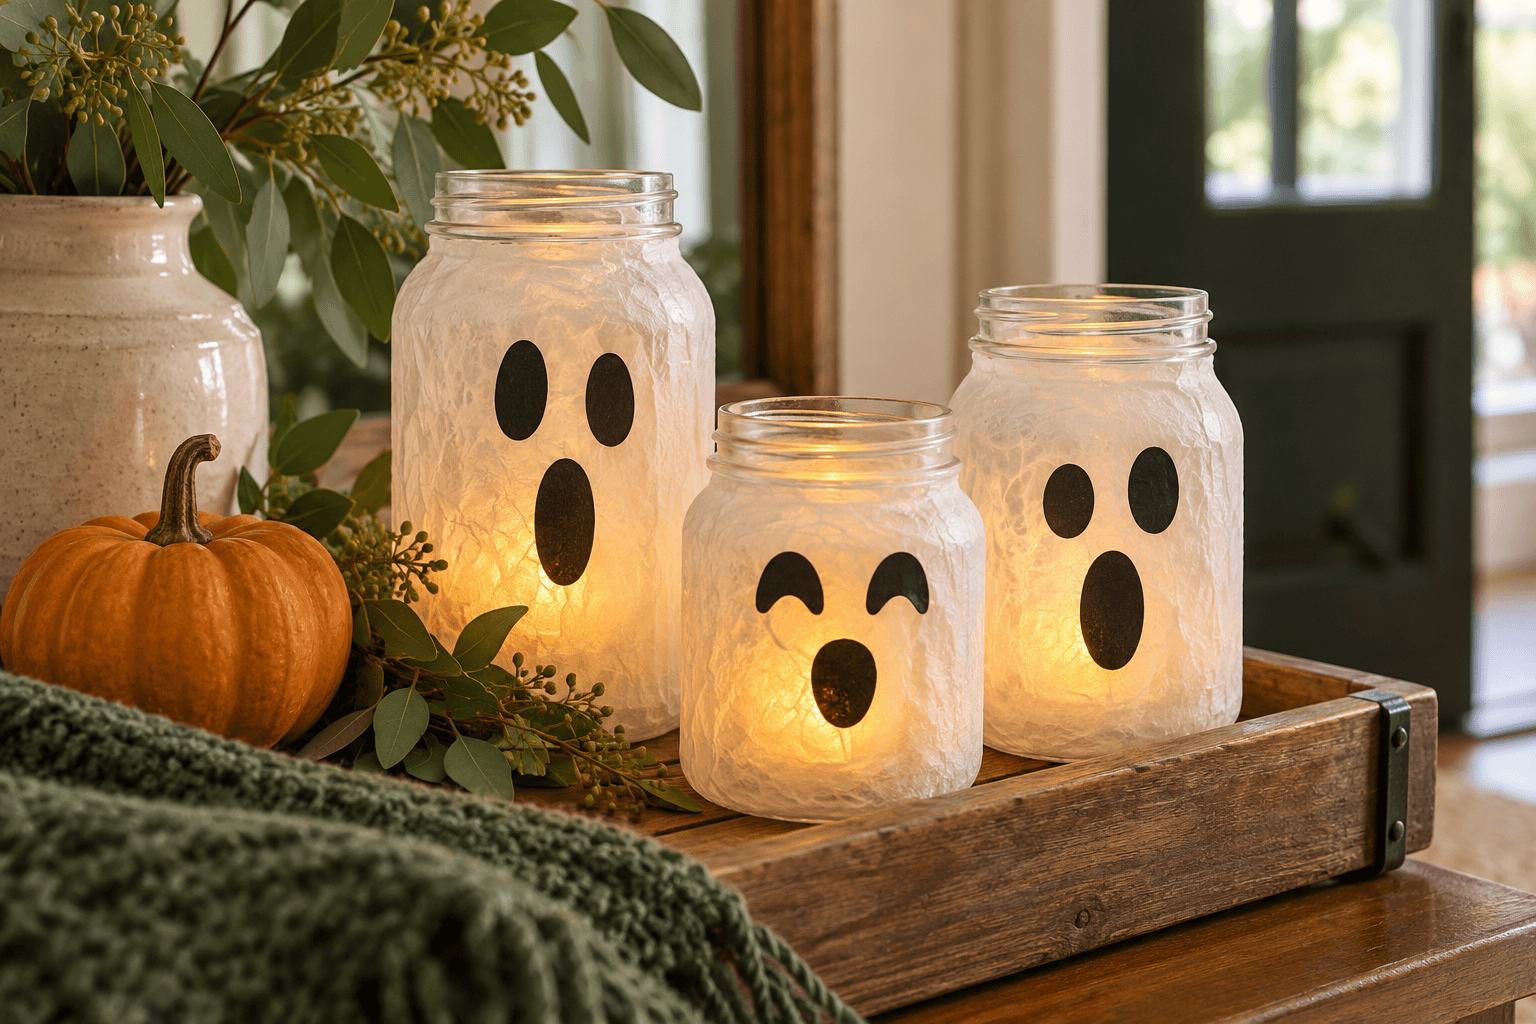
Hallmark’s 2026 trend guide includes a handmade approach to the season. This project turns that spirit into a small upcycled display: friendly ghost faces on translucent jars. Allow roughly 45 minutes of making time, followed by the drying and curing time on your decoupage product. Three different jar heights create variety without needing a large collection. These are indoor decorations with battery lights only.
1. Check and prepare the jars
Choose jars with openings wide enough to reach your LED tealights easily. Reject chipped or cracked glass. Remove labels, wash away food residue and let the jars dry completely, especially around the rim. Work on a covered table. If a label leaves adhesive behind, use a remover suitable for glass and wash it off fully before crafting. Do not paint or cover the inside of the jar.
2. Add a thin white tissue layer
Tear white tissue into manageable pieces. Brush a thin layer of decoupage medium onto a small area of the exterior and lay the tissue over it. Smooth gently from the center outward with a soft brush. Overlap edges just enough to cover gaps; thick overlapping layers block the glow. Continue around the jar, leaving its opening and base clear. A few wrinkles make the surface look handmade rather than spoiled.
3. Give the ghosts their expressions
Cut two oval eyes and a round mouth from black paper. Once the white layer is dry enough to handle, attach the features to one side using the same medium. Try one surprised face, one sleepy face and one tiny smile. Apply any finishing coat according to the product instructions. Let everything dry and cure fully before placing a light inside; drying time varies with room conditions and coating thickness.
4. Light and arrange the jars
Place a battery LED tealight in each jar and leave the tops open. Use lights with secure battery compartments, particularly where children or pets may be present. Never substitute a wax candle: the paper and coatings are combustible. Set the jars on a stable tray away from edges, then add a small unlit pumpkin alongside. Keep the grouping low enough that you can still see and reach your everyday items.
Troubleshooting, storage and a glass-free option
If the light looks dim, try a brighter suitable LED or use fewer tissue overlaps on your next jar. Do not scrape wet tissue to thin it. Keep finished jars dry and dust them gently; they are no longer dishwasher-safe or food-storage containers. Remove batteries for storage if the manufacturer advises it. For young children, an adult can make the glass version while the child decorates a paper ghost sleeve for a suitable battery light.
Inspiration & sources
Our original project instructions interpret these published seasonal style references. The image is a styling concept, not a photograph of a tested project.
Explore more in DIY & Crafts and Home & Decor.
Keep this little idea for later.
Save it here or add it to your own Pinterest board, ready for a free afternoon.
Pin this idea